Saturday, March 31, 2018

How I Store my Sentiment Stamps and a freebie

I do 80% of my sentiments in digital form.  I like to do batches of sentiments, put them in my digital die frames print and then use my Scan and Cut machine to cut them out .  Those then go into a storage cabnet or a large bider with pockets.  Someday I would like to have a library card catalog for storage of sentiments and scriptures, but until then I used my tool cabinet and binders.

I thought you might be interested in seeing how I store my rubber sentiment stamp- I think storage is always interesting!


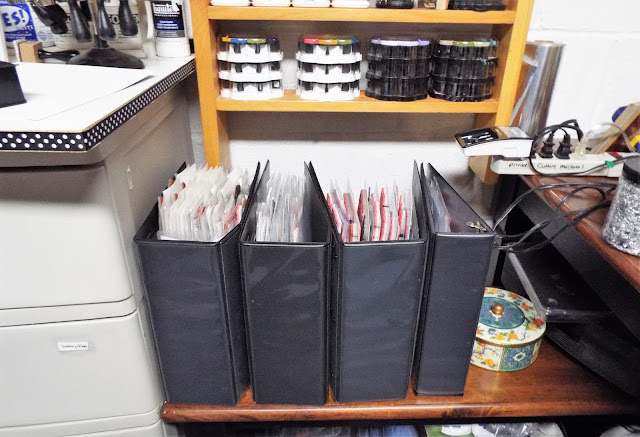
I use these giant media binders, they have 5-inch oval rings and are meant for CD storage. 


For individual stamps, I used baseball card holders


For sets, I use two pocket holders


I have one binder for bible verses and one binder for Sentiments and Sayings. 

This system works very well for me and it was very inexpensive, these binders are 10.95 each on Amazon.  This started with the Tim Holtz binders and trying to store my TH sets.  Well that would have taken a lot of those small binders and I did not want to spend 200.00 on binders so I went this route and spent 40.00 .

Room for two more!


Thanks for stopping by and here is a popular saying right now  for you to enjoy:

right :


Left


Ginny M


Friday, March 30, 2018

Baptism Card and a Freebie

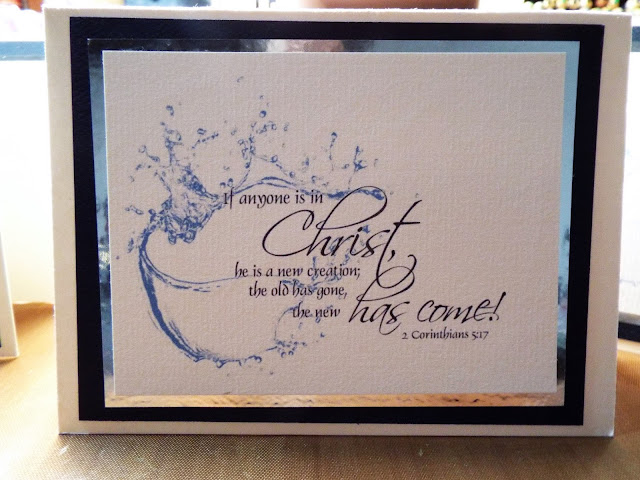
As the Church card lady, I have the privilege of making and sending cards to members and friends for various different occasions.  Baptism is one of my favorites.  I will share my card and the image with you.

Simple and encouraging! The card base is Heavenly White#120  and held together with Best Glue Ever - that mylar paper is a challenging paper to get adhesion on, a tiny bit of BGE works great!

Here is the digi I created ( I did not do the verse)  for your card making :


Right-click and Save to your files.

Thanks for stopping by,
Ginny M


Wednesday, March 28, 2018

Not only is is Word Art Wednesday, It is also What's on Your Desk wednesday

I'm a little late blogging and a little late entering, but it is still Wednesday! So I'm joining in WOYWW!  Click here to go to the start of the tour, At Lovely Julia's, blog, it is an internation tour of crafty work desks!
Short and sweet,  I've been doing lots of cards for my church mail ministry and DT's and tonight just took on another wedding jog (yay)!
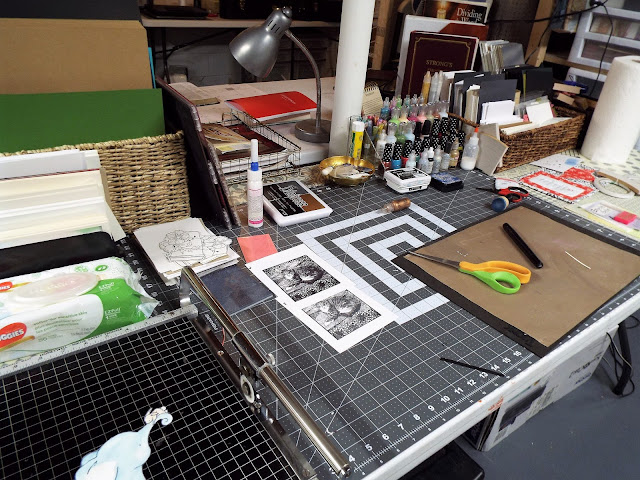
Tonight I am showing you my "wet" desk in between rounds.  At this desk, I do the card making mixed media etc.   Lots of room this is a big folding table 84x21


Steves work dest is right behind it!

Nothing overly exciting, just lots of room to work and everything organized.
Thanks for stopping by and join the tour!
Ginny M


Word Art Wednesday! And a Freebie

Happy Word Art Wednesday everyone! I hope you stop over to the Blog and join in the fun, We have an inspiring and uplifting devotion by Karen Letchworth and another beautiful bible verse digitized by Karen Murry! 
This week we have two sponsors :
The Project Bin $15 AND Bugaboo Stamps (4 digital images)
To Play:  go over to Word Art Wednesday and create a card, either with the verse or any family friendly card!  Enter it and that is it, there will be a random draw winner announced in two weeks! 
 Don't forget to mail that card and send someone a blessing!
This week I have to card samples, 
my first is using an image from our Sponsor  Bugaboo Stamps
Using the 4 Tulips set

I printed this out on an Anna Griffin paper


Colored in the tulips with alcohol markers and used red nail polish on the ladybugs and a sentiment from a previous WAW challenge.  Holding it all together, The Best Glue Ever


Love how that card came out!


My next card I also printed on designed paper ( from my stash) and used this weeks bible verse:


I just loved this image and I thought it went so well with this picture!


I also added a flower frame for you to enjoy Karen's verse

There is a lot going on my blog here today, thanks for stopping by and don't forget to check out Word Art Wednesday and join in the challenge fun!
Ginny M


Tuesday, March 27, 2018

One Stamp, Two styles, Part One, plus a freebie.

Today I wanted to make an elegant birthday card, but I didn't have more than 20 minutes to make it.  One way to achieve a really pretty card - heat embossing, glitter plus a fancy cardstock to showcase your art.  Here is my card with Details to follow:


The real beauty of this card is not my artwork, it is the paper I stamped it on.

This paper loves ink, It allows it to move freely in the swirls - you never know exactly how it will come out!


Looks like beautiful vintage plasterwork with high intensity shimmer!


I heat embossed using a gold powder in my stash


For coloring, I used only 3 alcohol markers. Instead of using a blender pen, I use 91% rubbing alcohol and a brush!  No more stain transferring from one color to another!

Add a bit of ribbon, distress glitter and a sentiment and my card was done in 15 minutes!


and for you today:


Thanks for stopping by!
Ginny M


Sunday, March 25, 2018

Printing and cutting with the Cricut Explore Air


A couple of weeks ago Steve Bought me a  Cricut Explore Air, I am still very excited about this.  I upgraded from last years explore.  The main reason for my wanting one was the double "hand" that can cut and score without changing blades and housing. It may not sound like much but when I am doing a run of 150 very intricate wedding invites, having that feature really save me a lot of time and effort.   Saturday night I was on the  FB group: Cricut Design Space - this is the Cricut Diva Melody Lane's group. After spending just a few minutes there, someone mentioned the Print and Cut Feature I didn't know it even had one!  Making a long story short- you can import a graphic file to your design space, then export it to your printer, then put it into your Cricut and it will scan and cut it.   My first thought was I can sell the scan and cut!  No, not going to.  they don't exactly work the same way and what I bought the SNC for it is doing perfectly. With the Cricut it is a little different purpose in my crafting  - it is a great tool!  I knew I was totally underutilizing it!

Melody actually took the time to answer my initial inquiry and I wanted to ask so many more questions.  But instead I found a video on the process, it is actually pretty simple.
I stamped and colored an image took a picture of it and loaded it into my PC then imported it into my design space. I enlarged it and then went through the process.  and here are my results:

Didn't this come out great? It cut pretty perfectly!


I am going to make something it for my Sweet Sweet little Grandson's nursery!

Here he is Aiden 4 mos


If you have a Cricut Explore machine did you know it could do this?
Well now you do, Give it a try!

Thanks for stopping by!
Ginny


Challenge Post

Okay, to be honest, I have no idea who I can send this too.  I purchased this stamp at the stamp show in Springfield MA at the Lost Coast / Carmens' Veranda table.  If you ever have the chance to go one of their events - go, you will find the most Eclectic images available.  Crazy and Cool! They also have great make and takes and plenty of help if you need help!  Do you use a Misti? or other stamping tools?  Using a stamping tool means you don't have to mount your stamps on foam!  That will save you a Ton of money.

Here is only one table of unmounted rubber!  When I get my new stamps 
I give them a light coating of Best Glue Ever and let it dry.  This becomes a long term sticky back, no foam needed ( I also do this to restore my cutting mats).  To stoe, I just place the stamp on my a storage card.


Apply a fine bead and spread - I used an old plastic card or a paint spatula


,
Here is my card:


Who would you send it too!


This card is my 3rd entry

Join in the Lost Coast Challenge with a card "Says Something", there is a great prize and the more that play the more they give away!
Thanks for stopping by and I hope you have a great day!


Friday, March 23, 2018

Coloring Pages, A Journal and Freebie

As an adult, I have enjoyed a little downtime with coloring.  I wasn't a very great at it as a kid, I actually thought it was kinda boring. Now I enjoy it if I can do a piece in less than 20 minutes and it has a purpose. - can I make a card out of it or a piece of wall art?   I have found that a lot of women love coloring in books and journals so I recently introduce Coloring bible verse to my women's group at church.  This type of coloring is very relaxing, I think about the verse and color.  I pulled 52 free printable off the internet from an array of sources and will post one on Mondays on the groups' FB page - fun!  I started this week and then made a journal to keep these pieces in.  Maybe someday I will give it as a gift.  I thought I would share the page and the journal with you all- you can save and print and maybe make a journal too!

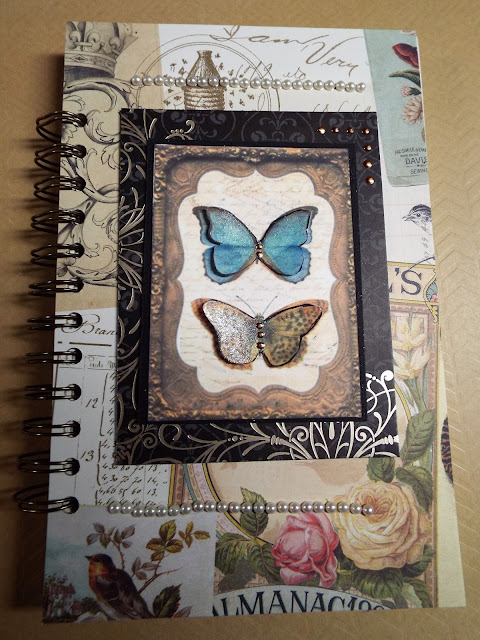
Here is the journal and the process:

front of the journal


Back 


 I just used a pretty piece if 12x12 that was in my stash.  the journal is  8.5x5.5- standard sheet cut in half. I used a 65# weight paper, I wanted it to be a nice paper to add more coloring or inking.


I used a stack cutter to cut the paper - all 52 sheets at once!


I am fortunate to have a cinch machine - it made binding this a snap!


To hold the covers on to the chipboard, Best Glue Ever makes it seamless.

a DT card I made a while ago that did not make it into the mail, I cut it up for the cover.


The first page colored and glued in. Tonight I will add my thoughts.


and if you would like to try coloring a verse, you can right click and save then print:

I love this verse especially this time of the year!

Thanks for stopping by
Ginny M


Strong Visual Man Cards and a freebie

I like to keep a stack of man cards on hand For Steve and I to send.  
The men need encouragement too!   
When I make man cards I keep in mind the things that Steve tells me that he likes: clear text, he does not like a flowery script. Strong line images, less pattern.  In other words bold simple cards.  On occasion, I do use botanicals but I make sure they are in masculine color palettes- deep rich color and lots of distressing.
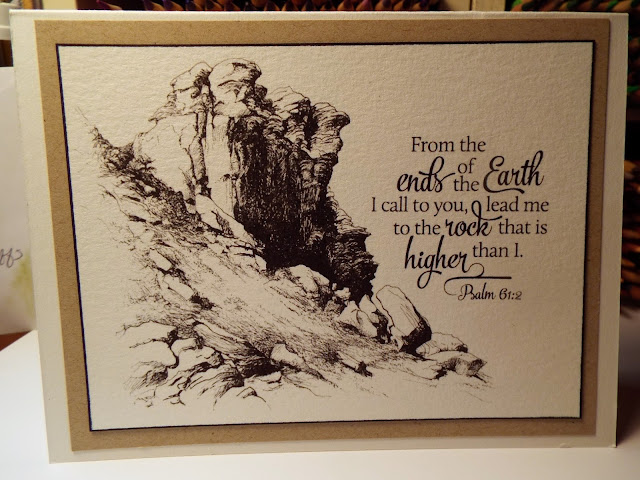
Another thing I keep in mind; how the paper feels in hand, it has to be a really good heavy quality paper.  If the card has little or no embellishing, it needs to have weight and texture.  here are a few cards I have made this week for men:


Doing them in batches is also helpful:


I have printed these card on Neenah Ivory#110 and used the 110# as a base.  Wonderful with the ink jet printer or traditional rubber stamping. 
Holding it all together, Is the Best Glue Ever.  The more I use  Best Glue Ever, the more I love it; it holds every in place without any distortion!

He is a freebie for your Man cards:
Thanks for stopping by and I hope you have a great day!
Ginny M


Thursday, March 22, 2018

Lost coast entry # 2

I have recently entered in a Lost Coast / Carmen Veranda Design Team call and in the process discovered they have monthly challenges over on their blog, with some pretty nice prizes!  I love Lost Coast/ Carmens' Veranda designs they are just really eclectic and very cool.  Since I am not into the Genre of cute I gravitate to the highly  detailed artsy stamps Lost Coast offers.  If you are into pithy quotes, you won't find any pithier than what LC offers!

and that is how my last post started  - the one I half deleted by accident.  Oh well, fortunately this is card making and not world peace talks.

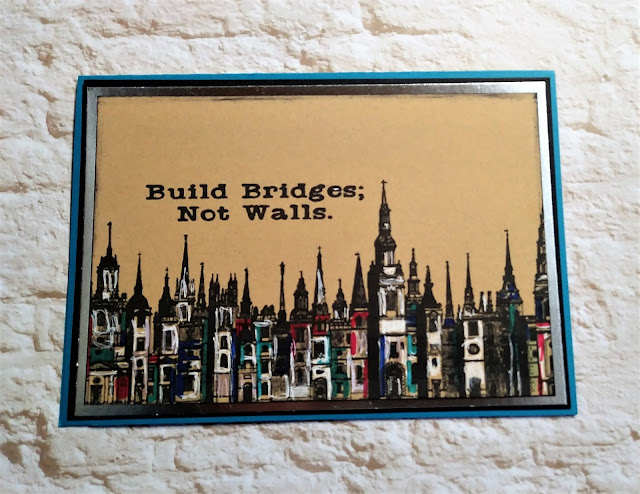
So here is my second card for the Lost Coast Challenge#49  This one is a little more philosophical


Ny Stamp is a cityscape stamped with Stazon Black on a coppery Neenah paper from my stash   and the sentiment is from the words and quotes  page .  Just a warning, not all the sentiments are G-rated, do not read with a mouth full of coffee, I am pretty sure you will end up with a pretty sticky keyboard.

For another take on this stamp in "pretty" colors check out my friend Lindsay 's(The Frugal Crafter)  video .


Well, time to put the lids on the ink pads and markers and dinner going.
Thanks for stopping by  and since I have posted so many times today I am going to leave you with a nice freebie:


Thanks for stopping by!
Ginny M


Lost Coast Challenge Fun entry#1!

I have recently entered in a Lost Coast / Carmen Veranda Design Team call and in the process discovered they have monthly challenges over on their blog, with some pretty nice prizes!  I love Lost Coast/ Carmens' Veranda designs they are just really eclectic and very cool.  Since I am not into the Genre of cute I gravitate to the highly detailed artsy stamps Lost Coast offers.  If you are into pithy quotes, you won't find any pithier than what LC offers!

Today I am entering in two cards for the challenge;

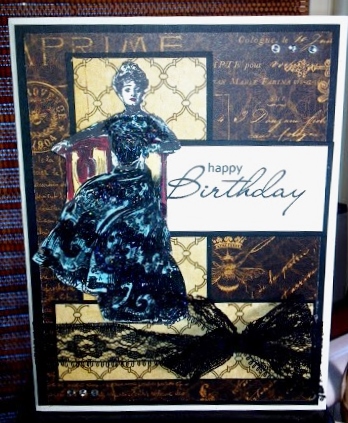
The challenge was simply "Say What"     Words on your cards.  Pretty easy to accomplish, my first card is a happy birthday card   I stamped the Gibson Girl image on  Paper Tempteress Heavenly White, I really fussy cut this image right down to the black line, colored the dress in aqua and added lots of blacks and a tiny bit of red glitter.  the background papers are from my stash and the card is 6x5


Lost Coast Designs was actually my first experience in purchasing unmounted rubber at the MA Heirloom Productions stamp show


It was also one of the first major companies to use Artsy images and remains today in the forefront for cool and unique.

Why not join the challenge, the more the merrier!

Thanks for stopping by,
Ginny M


Scripture Writing Set up for the Week

I have been following a daily scripture writing program for four years now, the more I do this the more I love it! It is one small process t...