Tuesday, September 20, 2016

New Fall Swap block

I had started my fall swap block ( for my crazy quilt group) a few weeks ago, last week I started stitching on it and decided before I made my hands hurt too much I would scrap the block.

I love the block but a few of those pieces are upholstery fabrics.  I did one seam and thought there is no way I can stitch these fabrics, not only was it hard on my hands, it pretty much ate my silk pearl thread.  YesI was using the correct needle, it was the fabric, to dense and too textured.


one really nice thing about doing crazy work, you really only use small scrap sizes for the piecing, it wasn't too heartbreaking to toss this. 

I started my fresh block and used a few tricks I've learned in my BCQC (basic crazy quilt class)

To wrap my Q-snap frame:  I used  Micropore tape ( a medical tape).  I bought a box of this last year to make homemade washi tape - which was just way to much work.

This wrap should last through many hoopings


 I wraped my q-snap for the first time and like it much better!  Plus instead of creating a foundation block and then sewing a skirt on it for hooping, I am just using a big piece of muslin for the foundation  that will have enough margin to hoop. That alone saved time, I don't know why I never thought of that!!

I pieced my fabrics without too many problems ( operator errors)

 I decided to square this block off so I could better determine the true block edges - plus it kinda bothered me raw like this.

Here is what I did:
8.5 x8.5 template for the finished size of the block

I used painters tape to create the square


 removed the paper, and now I have a squared block. Wen I am done stitching , I will add a backing with my label and serge the edges.


Hooped, nice and tight.  from here this hoop went into my lap stand.

I hope you find this helpful.  In an earlier post, I wondered if I would be able to stitch the heavy upholstery fabrics, now I know - and you do too!
It's not really great for hand embroidery!
Thanks for stopping by,
Ginny M

Sunday, September 18, 2016

Crazy Quilt class, task # 4 assembling the block for stitching

The next task # 3 was a lesson on balance and composition , color and shapes, task #4 required the block to be assembled using the information from the 3rd lesson ( task).   This was easy for me because I am a quilter and I have done a lot of crazy work.  I am not a fan of puzzles and this is a lot like assembling a puzzle.  This exercise is very good for me in that I have to follow directions - I am not so good at that.    If I hadn't been sewing for a while I can see where I would have stalled during the assembly.


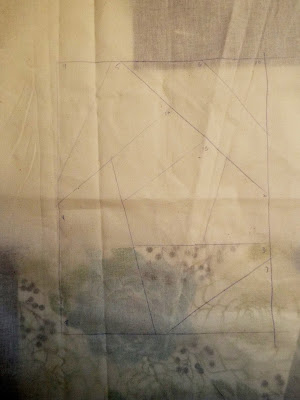
 The pattern is traced onto the foundation muslin:

paper pieces are cut out 


Pinned to fabric and cut out


Stitched down and hooped, ready for the embroidery tasks


Not my normal color palette, but by using neutrals, I can focus on the quality of my stitching.
I highly encourage you to try this class, it is always good to be in learning mode! you can go to Kathy's' blog for more info!

Thanks for stopping by!
Ginny M 


Saturday, September 17, 2016

Cranberry, Almond, Oat Meal Bread

This is a very easy recipe and so delicious!  One piece of this toast and an eg will fuel your entire morning!  You could make a sandwich with it, it is very de4se soft and slightly chewy.  II would use this to make a cashew or peanut butter sandwich.  No need for jelly the cranberries give it just the right amount of sweet and tangy !


2 cups organic white flour
2 cups Rolled old fashioned oats

I use Bobs Red mill - this is like quaker oats
place oats in food processor or blender until turned into flour
you can also use a Ninja or bullet - just do one cup at a time

1.5 cups warm water
2 TBS Better Balance  margarine
you can also use butter
2 TBS honey
2 TSP Salt
4TSP yeast
4 TSP vital wheat gluten
I use Bob's red mill
1/4 cup chopped almonds
1/2 cup dried cranberries

Add ingredients in the order above to large mixing bowl or your bread machine
If you are using a bread machine, use the last minute loaf or rapid loaf setting

If by hand- mix ingredients and then knead for about 10 minutes 
oil baking pan and place in oven for 25 minutes
at the end of 25 minutes turn the oven up to 375 and bake for 40 minutes.

Prep time 15 minutes 
oven time 65 minutes

This is really yummy, you family will love this!
Thanks for stopping by and have a great weekend!
Ginny M 


Friday, September 16, 2016

Crazy Quilt Class

I am starting an online crazy quilt for beginners this week.  I am very excited about doing this, the last needle class I took while it was a pain at the time, I am still reaping the benefits 8 years later.  I really need the instruction in ribbon embroidery and confidence building with seam treatments.

Out here in Texas I have no needle working friends, I have no one to sit and learn with, therefore I have no one to apply the pressure to learn more.  So taking a class seems perfect.  Not only all that educational crafty goodness happening in this class, it's free!  Kathy has a wonderful blog and online shop  Two books published and one on the way.


I thought it would be fun to share my progress here.  Really I cringe at seam treatments, and that is half of crazy quilting!!

At the onset of the class, a complete list of supplies is given , you photo and upload to a special class site blog.   Kathy checks your work, critique and gives you any help you need.  You do work at your own pace, one lesson at a time.

Task #1  Gathering supplies


Wrapped hoop and foundation fabric


Neutral fabric selections

Stitching supplies

Neutrals especially a whole pallet of them is not my thing, but when you are learning something, you really need to be able to see what you are doing, so that makes perfect sense!!

Next Task is Saturday!!

Thanks for stopping by,  tomorrow I will have a super bread recipe for you, I need to bake it and photo today!
Have a great day!
Ginny M

Monday, September 12, 2016

Almost done

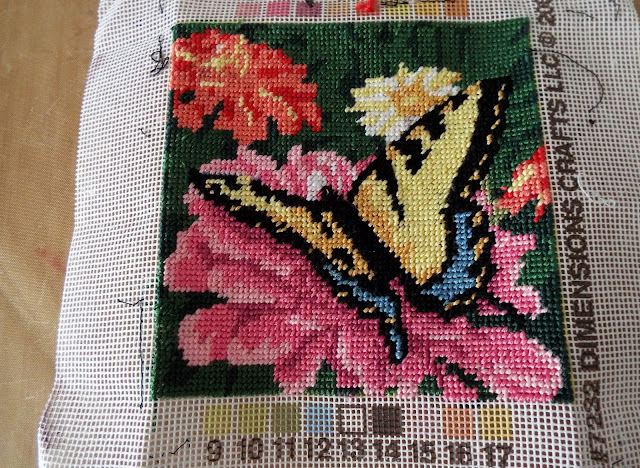
I'm just about done with my set of 5.5 x5.5 mini tapestries. About 6 weeks ago I started stitching two little tapestries to go with this one I did 30 years ago:


About 6 weeks ago I started stitching two little tapestries to go with this one I did 30 years ago


They really don't go together, but after I put them in matching or similar frames I think they will look great!


The new ones were too bright so I toned them down with a little tea bath


After


I wrapped them and now they are ready for framing


I also did these help me get back into the swing of needlepoint before I do larger images.   Each one of the new ones was 4900 stitches, I have a pillow on stand by that will be 4x that amount of stitching.
These were a lot of fun and very relaxing to do!
Thanks for stopping by!
Ginny M

Sunday, September 11, 2016

Butterfly # 4

This week I worked on butterfly #4.  This particular butterfly will be part of a seam treatment for a Round Robin Color Study I am doing for the CQ4N. if you would be interested in joining a Yahoo Crazy quilt group, let me know in the comments and I will send you the info!

Here is the process:

Lovely Stamp by Le Blanche Stamps:


The hooped fabric:


This was a nice cloth, but not suitable at all for these butterflies. The problem was the weave was to open and did not have enough body - lesson learned 

I used sewing thread for this butterfly: cotton and silk.


Here it is snipped from the ground cloth and backed  as part of a seam treatment.


This is about 2.5 inches wide

I learned a lot stitching this butterfly and I look forward to doing my next one!

Thanks for stopping by!  I hope you have had a nice weekend!
Ginny M


Thursday, September 8, 2016

Craft storage ideas

I enjoy a few types of crafting, one of them is crazy quilting.  Like any other craft, keeping these fun things stored and orderly is a real challenge.

The best way to keep things where you know where they are and able to get to is, to not have too much stuff.  I know that was just as funny to write as it was for you to read!

 I came up with a solution for my little stash.  I thought I would share it with you:

I keep my collections of fibers together.  All the silks, satins, wools, they all have their own space.  With crazy quilting, you only need little bits of things, actually lots of little bits of things.  So I came up with an expandable system to keep all those bits:


 I keep everything in drawers, these drawers are filled with collections of fibers, the bins underneath are fill with laces and trims.  What I was having a problem with were the beautiful fibers that I just had one skein of or small bits of lace.  Some of these things are pricey and I don't buy an 8.00 skein of fiber to loose it in a tub.


So after looking around the house, I had nothing I could use as far as a set of containers.
I came up with this cheap and easy solution!

Here is an example:


My solution:
Drawer partitions!

Fibers in the front, laces and bigger fibers in the back, all by color family

What you need:
Glue gun and card board1


Cut the cardboard, score bend and apply glue


 for those beautiful bits of fancy fabrics, I put them in a baggie by color family and then in a storage drawer:

Everything stays neat and findable!!

I hope this gives you a doable idea for your storage!

Thanks for stopping by!
Ginny M


Chocolate chip cookies- a little healthier recipe

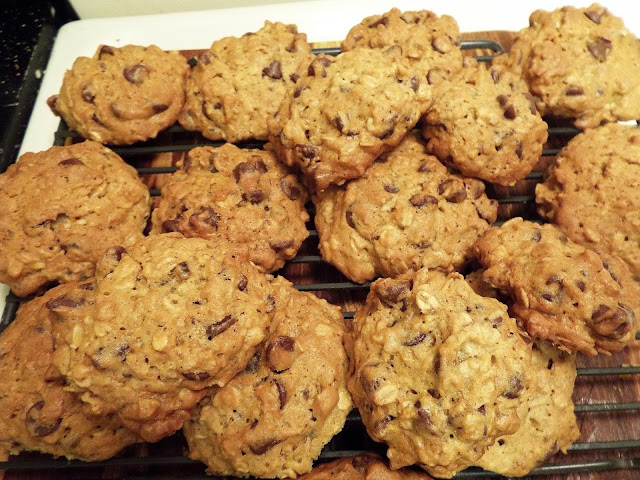
Chocolate chip cookies- a little healthier recipe - I think that is an oxymoron.  Steve and I still like  a snack at the end of our day, once in a while we have a bit of a sweet craving.  I always have homemade bread and jam in the house, sometimes popcorn, but sometimes we want chocolate!  For those occasions, I made this chocolate chip cookie recipe.   One or two of these cookies feels like a meal, so you won't overeat them!

2 cups white flour*
2 cups old rolled oats fashioned oats*
1tsp baking soda

Mix and set aside

In a mixer bowl- I use a stand mixer, but a hand one will work just fine

1/2 cup Smart balance (butter substitute- use butter if you can)
this is 1/2 the amount of a "normal" recipe
1/4 cup water
1/2 cup sugar
this is 1/3 the amount of a "normal" recipe
          1/2 cup date pieces*
3 large eggs
2 cups choco or carob chips
1cup chopped nuts
2tsp vanilla

you can also add raisins or cranberries - I like these in my cookies, but Steve is not a fan of them in the choco chip cookies.

Mix the wet ingredients, add the dry to the bowl
Bake at 375 until golden brown
about 4 dozen cookies.

These cookies freeze well, I keep ours in the freezer and just take them out one at a time.  These were big favorites when I had kids at home.


I purchase a lot of my pantry staples from Amazon, I have no affiliation and I am not receiving any products.  I have been using all of these products for at least 5 years.  Once I received a 25lb bag of flour that was about to expire, I requested a return and instead I was sent a new bag of flour within a few days.


I hope you try these they are really great!
Thanks for stopping by
Ginny M


Tuesday, September 6, 2016

Word Art Wednesday #246-247

Word Art Wednesday has its' bi-weekly challenge up and running and my favorite FB group, Christian Card Makers group also has a new challenge for September.  I thought I would use both of these cards for both of these challenges!  This week's beautiful verse was Created by Karen Murray


My Card:


For my CCM Challenge, a word of encouragement and a card Sketch:


If you would like more info about the Christian Card Makers Group, leave a comment and I will have an invite sent to you!

The second card does have a calendar page by Mary Englebrite, this is okay with her, the card isn't for sale and I am not altering the image.  Mary is all for recycling her beautiful calendar pages!!

While these cards were entered in challenges, I created them with two specific people in mind and I am looking forward to sending them off in the mail tomorrow!

I encourage you to stop over to Word Art Wednesday and enter your card, there is always a prize winner, but we all win with the free verse and the card receivers!!
Thanks for stopping by!
Ginny M


Monday, September 5, 2016

Apple Bread French Toast - dairy free - no bread machine used!

I hope you are all having a nice weekend, here in the USA we are enjoying "Labor Day"  It is our last Hurrah of the summer and it is a great time to enjoy family, traveling and eating.   We've spent the weekend traveling locally, there is a lot to see and do here in  South Texas.  We're always ready for a road trip!
Last night after a full day we were home for a late supper and I had a craving for french toast.   I wanted to try making a new bread without using my bread machine.  It was a success!  I will share this easy recipe:

This Yeast bread took 1 hour and 15 minutes!!
 I use Organic products, but this will work with non-organic too!

Apple Bread:

2 cups Organic white bread flour
2 cups whole wheat - I use white wheat berries and grind and sift and grind
4 tsp yeast
2tsp vital wheat gluten
2tsp salt
3 TBS Veg Oil ( I used safflower for this bread)
3 TBS raw honey
1.5 cups water 105 degrees
1 peeled and chopped granny smith apple
1/2 chopped walnuts

Very simple ingredient list


The amounts of the fruit and nuts were pretty random, you could more or less or none. raisins and cranberries would be nice also.


I added all of my ingredients except the apples into the mixing bowl and mixed/kneaded this for about 10 minutes on speed two in my KitchenAide stand mixer - Using the dough hook.
After the dough is kneaded  I placed it on my floured board and spread it out a bit and added the apples in the middle, then folded the edges over the center and kneaded it a bit to seal it.

If you don't have a mixer you can simply add the ingredients in a big bowl, get it mixed and turn out onto a floured surface , knead for 10 miniutes - then add your apples.  
I have a pecular problem, many fruits vegatables, and grains make my hands feel like I am getting burned when I touch them.  The skin gets red and Itchy and burns.  This is why I have a bread machine.  I am hoping using organic products will not have that affect on me.  Last night was good, I did not have a problem when I kneaded the apples in. 

Place your dough in an oiled bread pan - I never use the commercial sprays, they have stuff in there I am pretty sure isn't good for humans to eat - petrol products!
Let the bread rise in the oven on 225 for half an hour, then turn the oven up to 375 for 30 miniutes.

The texture of this bread is awesome and the flavor even better!  Perfect for french toast!
Toasted with homeade Cashew butter - so good!!
This would also work for a sand which bread.


For my french toast, I simply crack an egg into about 1/2 cup water, add cinnamon and nutmeg- no milk needed!!  I cook it with a little bit of "Smart Balance"  Butter subsitute.  This product is GMO free and it tastes great!    Removing Dairy from my diet was huge, I thought I would never be able to give up butter in my cooking.  But it was easy and I am so glad I did!


This lovely loaf of bread costs about $2.20 to make. you can't buy good artisan bread for that anywhere. When you cook at home you know exactly what you are eating and how fresh your ingredients are.  

The apple I used in this had been sitting in the fruit bow for about two weeks, it  didn't get rotated with the fresh incoming.  The skin was a bit shrively and not something I would look at and want to eat ( I am picky about somethings)  It was still a good piece of fruit and I did not want to throw it out.  Baking was a perfect use for it.  

I hope you give this recipe a try, it was delicious and satisfying.  Filled with good ingredients and Love!
Thanks for stopping by,
Ginny M

Whom Have I in Heaven but You? Journaling Ps73

Today's post is a very personal part of the testimony of my life and a part of the Open Journey journaling kit. I found the writings of ...