Thursday, January 30, 2014

Quick card

My wonderful friend Jane posted on Facebook today and that post  inspired me to make this card. The mail man had pulled his little truck up to the corner so that meant I had 18 minutes to get the card made and in the mail!  Jane lives close enough  to get the card tomorrow and She'll be surprised as she doesn't read my blog too often.
 
The card base was ready and I grabbed the back ground paper from a (another one!!) pile that I found earlier this week.  I digitized the  sentiment and printed cut and GLUED!  Any one interested in learning how to digitized sentiments?  It is really very simple if you know how to use word and have powerpoint.  I have power point but no clue how to use it.  I've been wanting to digitized sentiments for ever and was whining about it when for the millionth time Steve told it could be done in power point.  Really, he's been telling me forever to try it, but I was so intimidated by the program!  All I can say is duh on me, so simple!! 
I need to digitized this sentiment:
NOTHING VENTURED, NOTHING GAINED! 
 
Here's the  card  5x7 on 110# card base  ivory Strathmore
 
The background paper is from one of my chopped  12x12 stacks. I found this set buried behind some half made cards. Chopping those stacks has been a great asset in my card making, I do it all the time now.  I will leave some future stacks  in 12x6 size.
Nice sentiment too!!
Thanks for stopping by I hope your day is going well!
Ginny M

Wednesday, January 29, 2014

Steve told me to use the word Epiphany

So I had an Epiphany,  Last night, at 1 am.  Last week when we took our book binding class the only adhesive we used was good old glue.  Yes, very good, made for paper crafting glue,                          but glue non the less.
I picked up the little book to check to see if all was still nicely stuck to where it is supposed to be stuck.  No wrinkling or bumpiness.  It was still lovely.  So I decided to try making a card using a glue I bought last June at the Heirloom stamp show.  I asked  the booth owner for a really good glue for paper crafting, something that I could use in place of my hot glue gun - getting a little tired of sizzling my finger tips. Last nightI made one card and tried the "secret" and the card came out perfect!!!!
Now I know some of you don't care and I get that .  But I've made almost 400 cards in January and I have to think about ways to keep the unseen elements cost down.  It all that adds up. I want my cards to be really nice and that takes high quality supplies.  I have found ways to purchase high end card stocks for 25 cents a pound and envelopes for a similar price, and I need to do that because I may make 5000 cards this year.   I enjoy the whole process of the card making, but the whole point is the People I send the cards too!  The less I spend on unseen supplies the more I will have for quality papers and postage.
I've been using an ATG gun for the last two years and really love the ease of it.  The best price I've been able to get is at the 'thetapedepot.com' 158.00 for a case of 144.  That is a really good price. Uline sells 72 for 148.00.  But still that is a lot of money for tape!


I've had a case of this I've been using that I purchased last summer,  along with some more from other sales and finds.  I've noticed I am going through about 10-12 rolls a week.  The ATG tape works pretty good for most applications, unless you have textures then that requires a more heavy duty adhesive.  Some people use score tape.  I use a Uline product called  Hi Tack double sided film tape 60 yards per roll.  One of these rolls costs 11.00 + shipping.  One of these rolls do last a very long time so I don't feel the price is high compared to the use and value.
 
The best price I could find of the name brand score tape was 7.80 for 27 yards on Amazon (prime)
I prefer the 1/2 wide tape for this "score" tapes.
 I've used lots of glues in the past and still use some glue for some things now,  but  I wanted one glue to hold them all (why is the phrase "One ring to rule them all floating in my brain?")
Not it is not precious, it is glue.
So I reached for the glue that I had started to use instead of my hot glue gun.
 
 
It is called Crafter's pick by Api
This company several other types of glue and I've just read very good reviews on them.  This however is the only one I have and have tried.
 
At the Stamp show a 8oz bottle was $7.30 ; on amazon it is $7.90 (prime - no shipping)
I've had this one bottle since June 1st and some how it is not all dried up and unusable!
Gary Burlin himself told me that this glue was practically the solution for world piece. Of course he thought I would need a gallon of it. So I sprang for the  $7.30 and brought it home. A long time ago before roll on adhesives I used a product called FrameWeld (purchased through Dick Blick art supplies), used in the framing world, This glue reminds me of that glue.  
The whole Secret trick   we learned in the book binding class to use waxed paper to burnish with!  You have to burnish no matter what adhesive you use, using the waxed paper made this task so simple, it just glides over the papers smoothing it out perfectly!!
 
So I'm going to show you what I did, the first batch of cards were all made last night using heavy papers.  They look perfect today! All layers were glued excepted the sentiments that had dimensional tape.
 
 
smooth paper layer glued on textured Strathmore paper, I would have used score tape for the bottom layer on the card base. No problems with adhesion using the glue . No warping or rippling
 
I made two versions of this card and you can see, nice crisp surface and the bow glued down
 
 
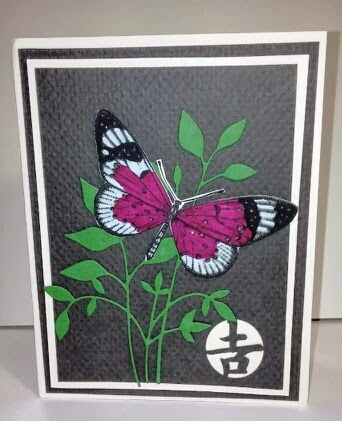
The butterflies as well as layers were glued on with the ultimate glue. very strong adhesion and no burned fingers! The base layer on the glitter paper stuck without problem. I would have used a core tape on that, the ATG just isn't strong enough for those papers with heavy texture, glitter and gloss finishes.


Clean and even no ATG goobers on the edges!
 
 
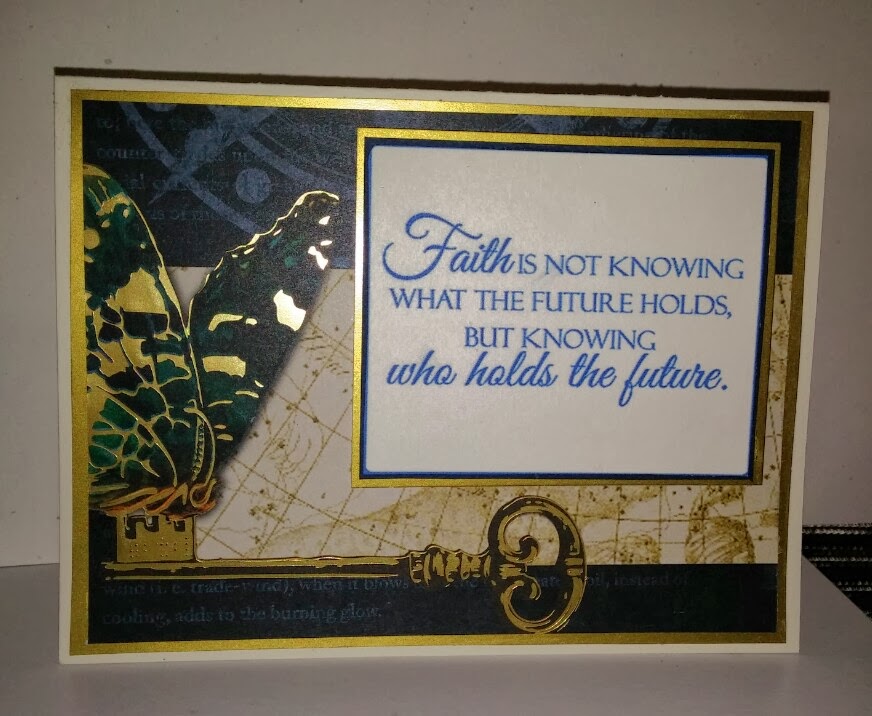
This card had a layer of texture on dry embossed high gloss paper.  The yellow layer was also a bit fragile and in the past would not hold up to the ATG gun rolling the tape on it. I also used the glue to adhere the Velum paper to the DP layer. No show through and no problem holding.
 
 Nice and flat
Multi layers- no bumps, perfectly smooth.
 
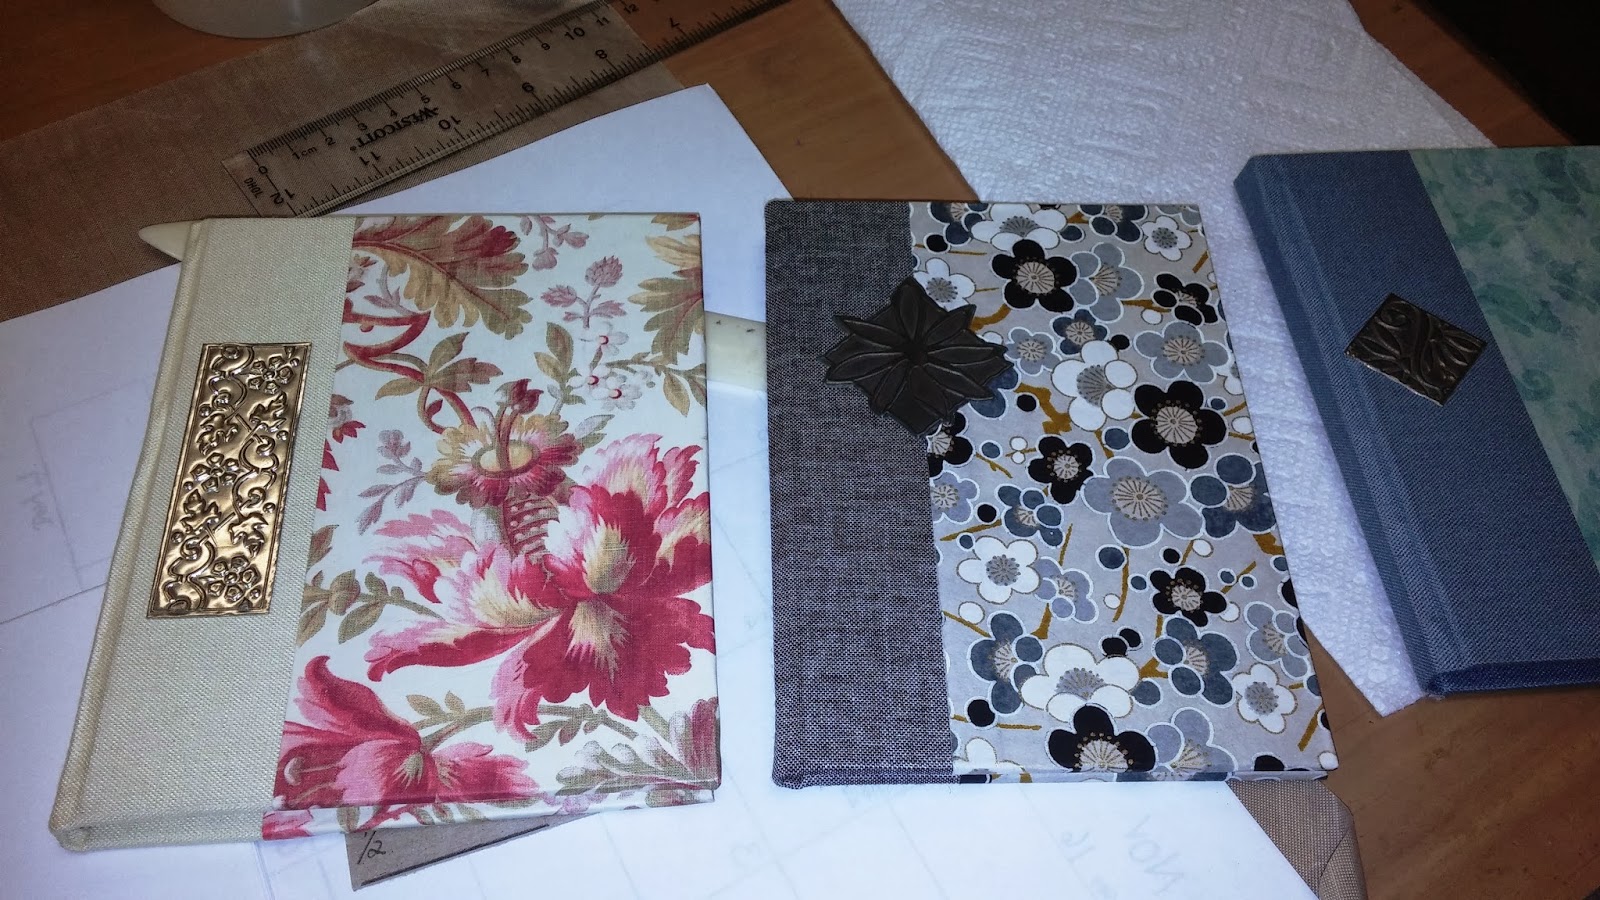
I made this card for a sick niece who loves vintage things.  With this card I was able to all these layers on the high gloss glitter and corrugated paper.  No problems, this is also a 'Use it up' card.


Those were last nights cards. 
So a little earlier I thought I would make a card with papers that were lighter. 
These were all under 65#. I am very happy to say it preformed just as well wit the light papers.
 
So I'm going to walk you through the gluing process so you can see what I did.
maybe this will work for you , maybe not but as they say, nothing ventured nothing gained!
first layer, this ended up being to much glue and I ended up having a couple of bumps.  I think the bottle was a little clogged.
 
flip and burnish.  Yes I wash a lot of dishes!
This paper is the thin designer paper that come in a stack of 500 sheet for 14.95 - THIN!
or something like that....
 
Looks good But


I see two bumps - to much glue unevenly spread out Bumps at the scissors points


I can hide that easy enough for this card but I don't want that to be something regular in future cards.
 
base layer going on to card stock, less glue this time, I did dot some more into corners after I took this picture to make she the corner were down tight.
 
 
See looks good! Again no tape coming out the sides !
 
Sentiment on the base  layer and burnished
 
 
Perfectly smooth
 
Thin paper on base layer
No wrinkling or puckering
 
 
Glue on back of ribbon and  cardstock.  Glue did not show through the ribbon


And that is it, here is the card:


I did an up close shot so that you can see for your self there are no problems from the glue.
 
I have to say, I had less problems with the glue applications  than I normally do with the ATG application.  if you use an ATG gun you know what I am talking about, snags and skips and run over goobies. Also sometimes the ATG just isn't strong enough, I received a beautiful OSA card two weeks ago in pieces, they layers just weren't held by the ATG tape.
 
I am pretty sure I will still be using the ATG for various things but not as a go to adhesion for my cards. One  I will use the ATG  for envelopes, I won't lick an envelope, I use the gun on that and for my homemade envelopes.
 
I hope you found this post useful, I'm glad I tried this and look forward to saving $$ in the future.  I'd be happy to answer any questions, just leave them in the comments.
Thanks for stopping by, have a great day!!
 
Ginny M


Tuesday, January 28, 2014

WOYWW#243

Workdesk Wednesday and the on going global blog hop! It all starts here at Julia Dunnits blog.  Hop over to join the fun!

My work desk today is a mobile work desk, I'm at stamp camp here!!
 
 
From that pile came this cute card:


 My work desk at home is covered with about 100 butterflies that I'm fussy cutting for cards.
I distinctly remember saying I was not going to do things in batches anymore but alias I did!!
I'll  post those cards later when they are done!
I hope you have time to browse the artful desks presented around the world. I especially plan to linger in the places that it is warm!! Hello Oz!

Thanks for stopping by and have a great day! 
Ginny M


Guess what happens

If you were ever wondering what happens when a 6 quart Cast Iron Dutch oven (my prized Le Crueset dutch oven) crashes on a glass top stove:
 
 
Yep that is what happens.  The pot however is okay.
I'll be stove shopping
 
'Pots slip and fall on the just and the unjust'
 
Thanks for stopping by an have a great day!
Ginny M

Monday, January 27, 2014

Not to much crafting ths weekend

Here at Maxam Made, the kitchen project continues and is coming out beautifully! This morning I put my dishes away in my beautiful remade cup boards!  3 weeks before Christmas Steve and I were in home depot pricing cabinets.  We were thinking about rehabbing our little kitchen, make it nicer while we are here and improve it  to help sell the house.  A nice college student came up to us and asked if we'd like someone to come out and give us an estimate on having Home Depot rehab our kitchen.  We said sure.  Long story short a very skilled salesman came out and tried so very hard to convince us we needed to spend almost 9,000.00 on our 10x 13 kitchen to REFACE our old cabinets - no floor - no counter tops - JUST new doors and facing on the old cabinets.  Come on now, we priced new cabinets and counter tops for less than 3,000.00 while we were in HD.  So Steve has painted the kitchen a pale, pale yellow (it was a darker shade of yellow)  built a ceiling to floor cup board that looks like a piece of furniture; he has redone our cabinets INSDE and OUT, New hardware, and will put in new counters, for less than 600.00.  This little kitchen is a very usable and sweet space, Steve has made every inch conducive to my cooking adventures  and I am thankful for that as I do love to cook !
I'll post pictures when we've finished.
 
I did get a few "use it up" cards done this weekend and I will be using them for an upcoming swap:


This is for a "Spring Shower" swap it is 5x7


This is for an "anything B" swap - Bird of Paradise stamp - 4.5x6.5 size


This card I love and will have to try to make more, for a "St Patricks Day" swap  5.5x6.5
 
Then in the process of
shuffling a few things around, I found this stack of paper Cut and ready to use on A6 Cards:
There are at least 60 pieces here of very nice DP/cardstock weight.  Oh boy sometimes I feel like I will never get to the bottom of the "use it up bin"!  One thing I have learned: not to do  project parts "to use later"!!
 
My total now is 122 cards made from scraps and stash.    I'm keeping a tally of my cards made for the year in my side bar.  So far for January, including the Use it up card I'm at 381.  This week I need to get a bunch of birthday cards made and think about reopening my little card shop.
Well I'm back to my kitchen work and happy to be doing that!
 
Anybody else trying to use up their stash and leftovers?
 
Thanks you for stopping by and have a great Day!
Ginny M


Saturday, January 25, 2014

A few fun things I didn't make!!

What a great mail day yesterday!
I received cards and goodies!
From Margo I received this beautiful butterfly thank you card  - so elegant in cream, charcoal, purple and green! Margo hails from Washington and is a fellow Oriental Stamp Arts member!
Thank you Margo!!


 From Mary Redford in Indiana, Mary is also an OSA member,  This Beautiful thank you card in vibrant Yellows and Oranges, Thank you Mary the card is a beauty!!

 
From Rosemary (another OSA member) I received this whopping stash of Washi!  She sent me this because I sent her a few bird images!
I can't wait till rosemary needs something else!
Thank you Rosemary this was such a lovely generous gift!!
 
 
Washi is a beautiful paper made from rice and is highly prized in Asian Art.
 
I made this card for my Niece last night:
 
Don't you just love Happy Mail!
Thanks for stopping by!!
Ginny M


Friday, January 24, 2014

Book Making class

Yesterday Steve and I took a basic book making class.  What a fun event that was!! I've been making books and journals and things for years, But I've never  learned "traditional " basic booking making. 
Here are the teachers books:
When I saw these I really felt delighted to learn how to make them! I'm not sure what I was expecting but this was good!!
Here Pat demonstrates measuring for the stitching holes on the signatures of the pages, Very simple!!
Steve sewing the signatures ( poor hands beat up from weather and a slip of the drill) .
This is the interior of the book, it is slightly off as the book boards were discovered to be cut at the wrong size!  Our teacher felt pretty bad about this , but we felt like it was a learning experience and we were very happy with what we walked away with!
The finished books: I thought these came out great for our first attempt!
One of the reasons I took this class is because I thought I would learn something without having to purchase a whole new line of craft supplies. I was right I had everything I needed except the twill tape used at the top and bottom of the spine.  This "headband" is a 1/4-1/2 piece of twill tape used to give the top and bottom a nice little finish.  So I broke down and spent $5.75 on it.  Everything else I had: Book boards, glues, papers, binding papers, fabrics.  I showed my friend Goldie and the first thing she asked me is I would teach a group! So I said sure right after I am sure I know what I am doing!
Here I am pulling from drawers the supplies I will need for bookmaking and placing it all in a couple of drawers. Easy and now accessible!  I plan to do a step by step tutorial on the blog.  This is a great little project and chances are you can use supplies you have at home on hand too!
Thanks for stopping by and I hope you have a great day!!
Ginny M

Wednesday, January 22, 2014

What's on Your WorkDesk #242

Wednesday  means WOYWW and today is episode #242! Go over to Julia's blog to start the world wide desk hop!
On my desk today: I needed 22 birthday cards for Oriental Stamp Arts birthday list for the month of February.
With OSA I have to keep a lot of things organized so the first thing on my desk is my OSA note book.  I keep a written record of the data base and of my swaps. This is invaluable for me in keeping on top of things.  I have such a note books for my other 2 swap groups and my church and family lists.
 
I had about 4 hours to get these 22 cards made. For February I made about 5 different cards, For the following months I will make one card for that month.  About half of the February cards will be going out in the next couple of days to allow for global mailing times. 
This is just something I decided to do with OSA - Birthdays.  For January I made about 20 and then realized half of them would become belated Birthday cards.
 
For the Hops' sake here is my work desk!


For this Project I used my trusty dover print book:  120 images for 5.99!  These are beautiful vintage Japanese prints.  I printed them on Neenah solar white 80# laid paper.
 
 
My found on tree belt printer:
 
The cards:


I made 8 of these cards, the Happy birthday sentiment is on the inside, the outside holds a bookmark on a couple of removable glue dots!


I think these were my favorite of this batch.


 Today I will write them all out and address them.
Thanks for stopping by and I hope you have time to join the hop!
Ginny M

Scripture Writing Set up for the Week

I have been following a daily scripture writing program for four years now, the more I do this the more I love it! It is one small process t...