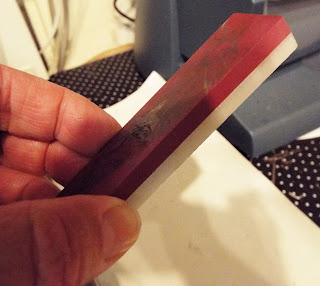
To keep everything sharp I decided to look to for a sharpening stone that I could work with instead of taking things apart and bringing them to the place where they do this.
I Looked on eBay for a sharpening stone and since I really don't know a lot about sharpening things I used the small amount of knowledge I do have and picked this ruby/quartz oil stone. White side for working out really dull blades and dings, red side to polish and hone the blade. These are meant to be used wet. You can use water, I used a bit of mineral oil. Since I sharpen my own scissors and Kitchen knives, I thought how much harder could this be? I would have mentioned the seller but since there were no instructions of any kind with this and the seller didn't a great rating or respond to my question about instructions, I'm not leaving his name.
I paid 6.00 including shipping and this will last longer than I know where it is.
I've used it on my guillotine cutters and it brought the blade up beautifully. I know a guillotine is supposed to be self sharpening but working the blade on the stone did give it a much better edge. That means on my Boston cutter I can do 4 sheets of 100# with a good clean cut - I was only getting 2!
More importantly I wanted to put a better edge on my rotary trimmers, with the blades costing 40.00 each it is very important to me to make it last as long as possible.
If you have one of these trimmers (they are very expensive, fortunately I purchased my 12" on eBay for 40.00 - they sell for 300.00+ and the 6" for 20.00) you need to also maintain the cog and trolley bar. It's simple, clean and a few drops of oil or silicone spray or better yet Triflo liquid. Just remember to wipe everything down, you don't want oil on your papers!!
My cutter is about 20 years old, I've had it for 5 and use it every day - a lot! It is a fine precision trimmer and literally shaves paper
To bring the edge back up to razor sharpness
running the blade along the stone a an angle on both side
Working this carefully I was able to achieve a honed edge.
The sharpening and oiling took about 5 minutes on the big trimmer
The little one took a little longer. This machine is new to me and came also from ebay.
It has proved invaluable already in making my card kits. The blade was rusty and there were no guide ling on the cutter bed or measurements across the top. That is not good, not when you are cutting for kits.
That fix was fairly simple, I glued a hem guide across the top bar and I will be finding a grid to print and place on the bed
The blade took about 15 minutes to clean, hone and oil
The guy I bought this from thought it was for cutting plastic - it is a vintage industrial photo trimmer!
The stone and new trimmer cost less than one trip to the sharpening shop.
It now sits on my very space challenge desk - Yay!
Here is a picture of the card/Kit I was working on
I sell these the in kits of 4 cards, I make one and everything you need is in the kit to make 3 more. 7.00 + 2.50 for shipping
Thanks for stopping by and if you cut a lot you might want to try an oil stone too!
Ginny M


3 comments:
Always appreciate your info on materials! This is a lovely card - so fun and sassy!
Thanks for the info, might just have to give this a go!
Hugs
Dawn xx
Thanks for sharing your wonderful knowledge Ginny! I also cut a LOT of paper & blades are expensive :-( I will DEFINITELY give this a try!
Post a Comment